

Complete Guide to Building a Website on Linux Using aaPanel (BT Panel)
Introduction
:::warning Important Note The content of this article may differ from the actual situation due to aaPanel version updates. This guide is for reference and learning purposes only. For actual operations, please refer to the latest tutorials and documentation provided on the official aaPanel website. :::
For developers or webmasters who want to set up their own websites, traditional command-line operations can be complex and error-prone. aaPanel (formerly known as BT Panel) is an excellent server management tool that greatly simplifies the website deployment process. This article will walk you through installing aaPanel on a Linux server and using it to build a complete website.
Prerequisites
Server Requirements
Before you begin, you’ll need the following:
- A Linux server (CentOS 7.x, Ubuntu 18.04+, or Debian 9+ recommended)
- Root or sudo access to the server
- A stable internet connection
- Recommended specs: 1 CPU core, 1 GB RAM, 20 GB+ disk space
Domain Name (Optional)
While you can access your site via IP address, a domain name provides a better user experience. You can purchase one from providers like Alibaba Cloud, Tencent Cloud, or any domain registrar.
Installing aaPanel
Connect to Your Server
First, connect to your Linux server via SSH:
ssh root@your_server_ipEnter your password to log in.
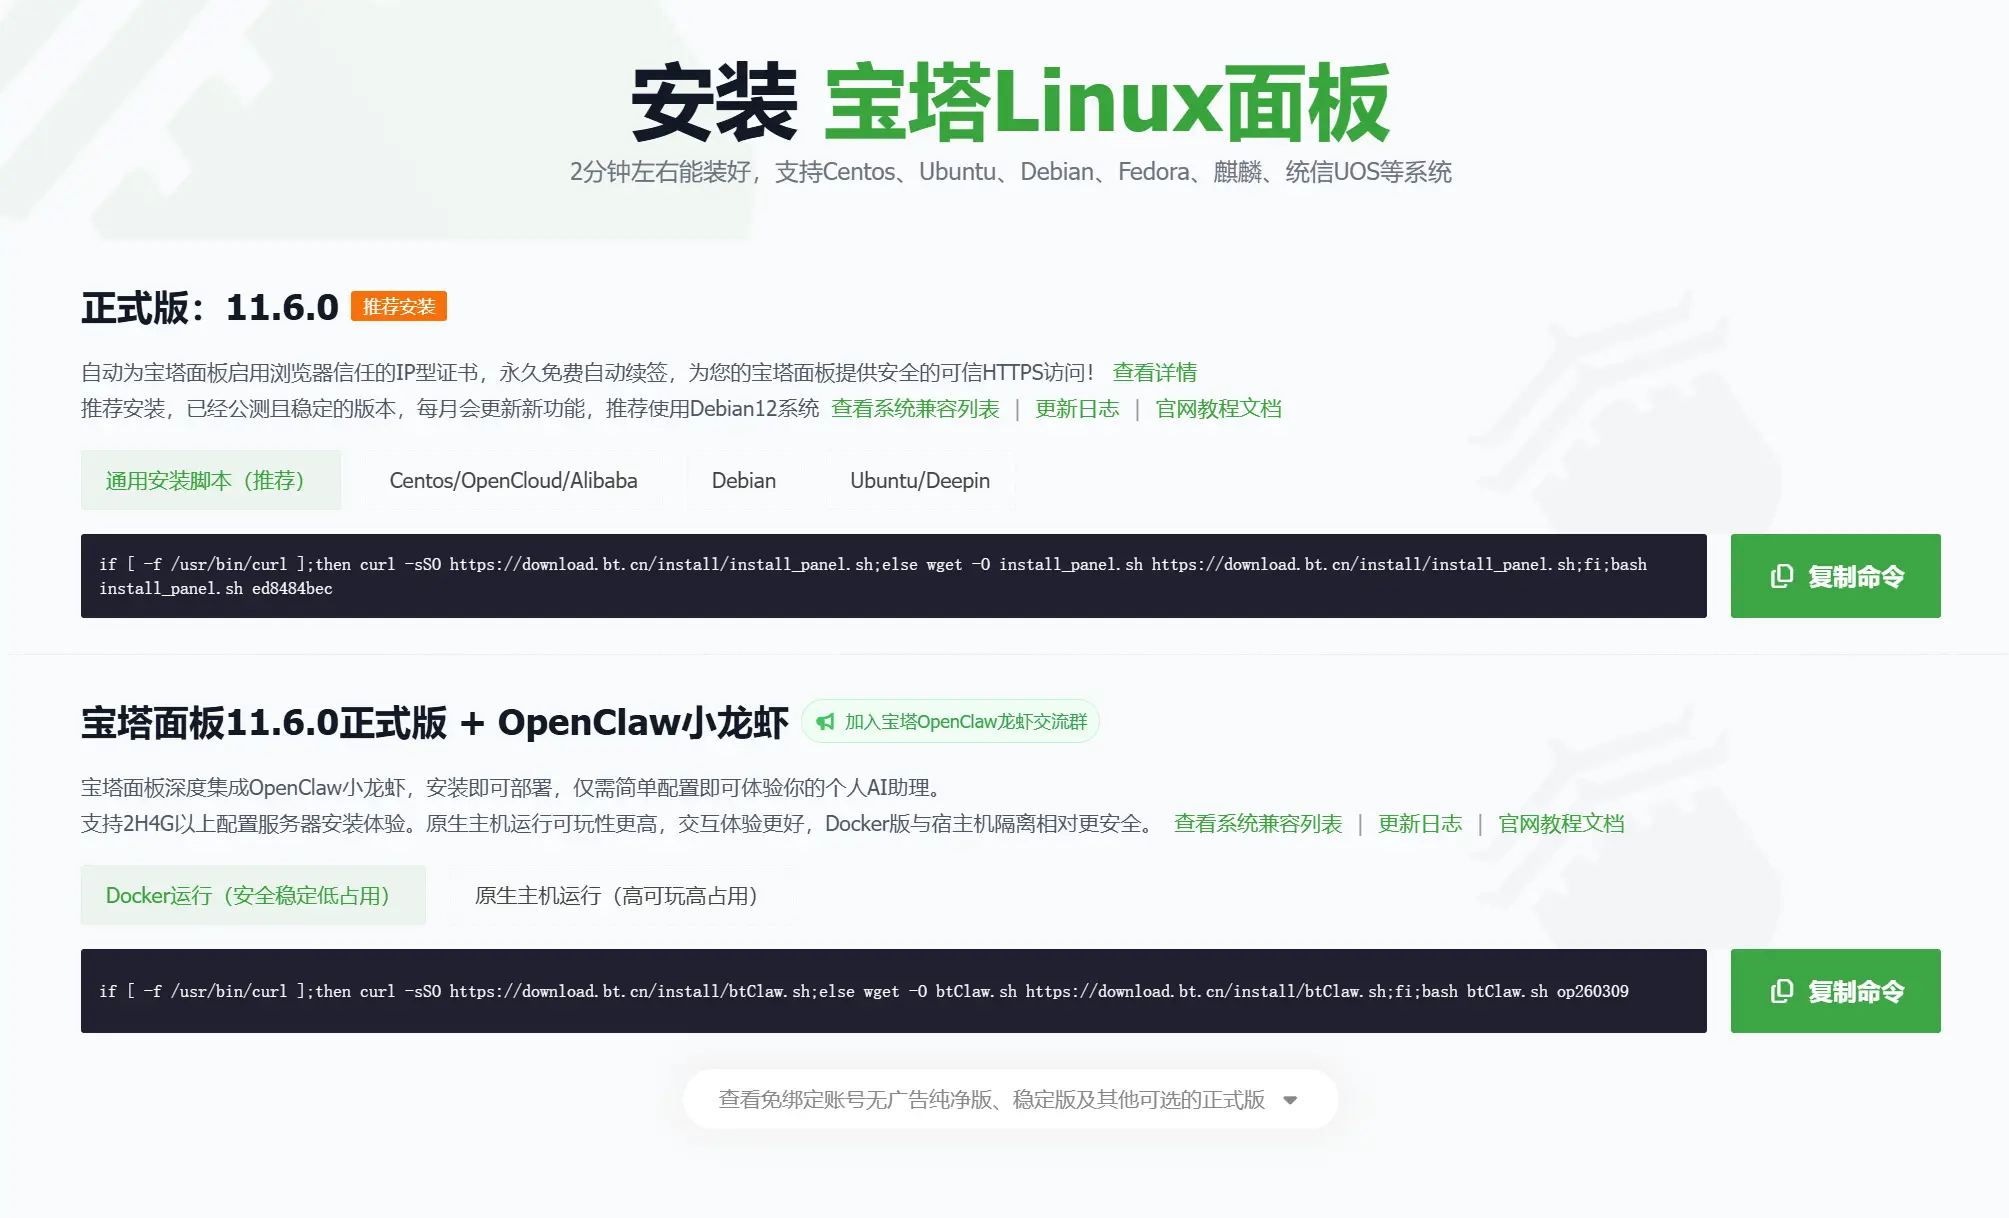
Run the Installation Command
:::tip Note
The security entry parameter in the installation command below (e.g., ed8484bec) is just an example. The system will generate a random security entry automatically during actual installation. Always use the latest official installation command from the aaPanel website.
:::
Choose the appropriate installation command for your operating system:
CentOS / AlmaLinux / Rocky Linux
yum install -y wget && wget -O install.sh https://download.bt.cn/install/install_6.0.sh && sh install.shUbuntu / Debian
wget -O install.sh https://download.bt.cn/install/install-ubuntu_6.0.sh && sudo bash install.shOther Linux Distributions
wget -O install.sh https://download.bt.cn/install/install_6.0.sh && bash install.sh:::info Getting the Latest Command Visit the official aaPanel website homepage to get the latest installation command for your specific operating system. :::
Installation Process
After running the installation command, you’ll be prompted to confirm. Type y and press Enter to proceed. The installation typically takes 5–15 minutes, depending on your server’s performance and network speed.
Once completed, the terminal will display something like:
==================================================================Congratulations! Installed successfully!==================================================================External Panel URL: http://your_server_ip:random_port/random_security_entryInternal Panel URL: http://your_local_ip:random_port/random_security_entryusername: random_usernamepassword: random_passwordWarning:If you cannot access the panel,release the following port (panel_port|80|443|20|21) in the security group==================================================================:::warning Important Newer versions of aaPanel use random ports and random security entries by default, rather than the fixed 8888 port. Please carefully record the full access URL, username, and password displayed after installation. :::
Save this information somewhere safe – especially the access URL, username, and password.
Logging Into aaPanel
Open Required Ports
Before logging in for the first time, ensure your server’s security group has the necessary ports open:
- aaPanel Port: The random port displayed after installation (not fixed at 8888)
- 80: HTTP
- 443: HTTPS
- 20/21: FTP (if you need FTP access)
- 3306: MySQL (only if remote database access is required)
:::tip Port Notes Newer aaPanel versions use random ports for improved security. Check the installation output for your specific port number. If you’re using a cloud server (e.g., Alibaba Cloud, Tencent Cloud), you’ll need to open these ports in the cloud console’s security group settings. :::
Access the Panel
In your browser, enter the External Panel URL displayed after installation, for example:
http://your_server_ip:random_port/random_security_entryEnter the username and password you recorded earlier to log in.
:::warning Important If you can’t access the panel, check:
- Whether the server firewall has opened the panel port
- Whether the cloud security group has opened the panel port
- Whether the access URL is correct (including port number and security entry) :::
Initial Configuration
On first login, aaPanel will recommend installing a set of common software packages. For website hosting, we recommend the LNMP stack:
- Nginx – Web server
- MySQL – Database
- PHP – Scripting language
- phpMyAdmin – Database management tool
Choose the appropriate versions based on your needs, then click “One‑Click Install”. The installation may take some time, so please be patient.
Creating a Website
Add a Site
- Click “Website” in the left sidebar
- Click the “Add Site” button
- Fill in the required information:
- Domain: Enter your domain name (or use your IP address if you don’t have a domain yet)
- Root Directory: The path for your website files – the default is fine
- Database: Choose whether to create a database and its type
- PHP Version: Select the appropriate PHP version
- Remark: Optional – for identifying the site’s purpose
- Click “Submit” to create the site
Upload Website Files
Method 1: Upload via File Manager
- Click “Files” in the left sidebar
- Navigate to the site root directory (usually
/www/wwwroot/your_domain) - Click the “Upload” button and select your local website files
- Wait for the upload to complete
Method 2: Upload via FTP
- Click “FTP” in the left sidebar
- View the FTP account details
- Connect to the server using an FTP client (e.g., FileZilla)
- Upload your files to the corresponding directory
Method 3: Clone via Git
If your project is hosted on GitHub or another Git platform:
- Open a terminal in your site root directory
- Run the git clone command:
cd /www/wwwroot/your_domaingit clone https://github.com/username/repo.git .Configure Your Site
Basic Settings
- Click “Settings” next to your site in the list
- You can modify the following:
- Domain Management: Add or remove domains
- Directory Binding: Change the site root directory
- Traffic Limiting: Set bandwidth limits
- Rewrite Rules: Configure URL rewrite rules (pseudo‑static)
SSL Certificate Configuration
To enable HTTPS access for your site:
- In the site settings, click “SSL”
- Select “Let’s Encrypt” for a free certificate
- Check the domains you want to secure
- Click the “Apply” button
- Once issued, enable “Force HTTPS”
Domain Name Resolution
Get Your Server IP Address
You can find your public IP address on the aaPanel dashboard or in your server information.
Configure DNS Resolution
-
Log in to your domain registrar’s control panel (e.g., Alibaba Cloud, Tencent Cloud)
-
Find the DNS resolution settings
-
Add an A record:
- Host Record:
@(for the root domain) orwww - Record Value: Your server’s IP address
- TTL: Default is fine
- Host Record:
-
Wait for DNS propagation (typically takes anywhere from a few minutes to a few hours)
Verify Resolution
Use the ping command to check if the domain resolves correctly:
ping your_domain.comIf it returns your server’s IP address, the resolution is successful.
Security Optimisation
Change the Panel Port
To improve security, it’s recommended to periodically change the aaPanel access port:
- After logging in, click “Panel Settings” in the left sidebar
- Find the “Panel Port” option
- Change it to an uncommon high port (e.g., between 10000‑65535)
- Save the settings and restart the panel service
:::warning Important After changing the port, make sure to:
- Open the new port in your cloud security group
- Close the old port’s security group rules
- Access the panel using the new port address :::
Set a Strong Password
Ensure your password is complex – include uppercase and lowercase letters, numbers, and special characters.
Enable the Firewall
- Click “Security” in the left sidebar
- Enable the system firewall
- Only open necessary ports
- Consider setting up IP whitelists to restrict access
Keep Everything Updated
Regularly update aaPanel and all installed software:
- Click “Update” on the dashboard to check for the latest version
- Apply security patches promptly
- Update web servers, databases, and other components
Backup Strategy
- Click “Scheduled Tasks” in the left sidebar
- Add regular backup tasks:
- Back up website files
- Back up databases
- Set retention periods
- You can choose to back up locally or to remote storage
Performance Optimisation
Nginx Optimisation
- Find Nginx in the App Store
- Click “Settings” to optimise:
- Enable gzip compression
- Adjust
worker_processesto match your CPU cores - Configure caching strategies
PHP Optimisation
- Adjust PHP settings:
memory_limit– increase appropriatelymax_execution_time– set a reasonable valueopcache– enable OPcache for speed
Database Optimisation
- In MySQL settings:
- Adjust
innodb_buffer_pool_size - Enable query caching
- Regularly optimise table structures
- Adjust
Enable CDN (Optional)
For high‑traffic websites, consider using a CDN:
- Sign up for a CDN provider (e.g., Alibaba Cloud CDN, Tencent Cloud CDN)
- Point your domain’s CNAME to the CDN‑provided address
- Configure your origin server settings in the CDN console
- Set caching policies and HTTPS certificates
A CDN effectively reduces server load and improves user access speed, especially for static content delivery.
Monitoring & Maintenance
Monitor Server Status
aaPanel provides comprehensive monitoring features:
- CPU usage
- Memory usage
- Disk space
- Network traffic
- System load
Regularly check these metrics to catch potential issues early.
Log Management
- View access logs and error logs in your site settings
- Analyse logs to identify problems
- Periodically clean old logs to free up space
Common Issues & Fixes
Website Not Accessible
- Check if the server is running
- Confirm the security group ports are open
- Verify domain resolution is correct
- Check Nginx/Apache error logs
Database Connection Failed
- Confirm the database service is running
- Check database username and password
- Verify database permissions
- Check database error logs
Pages Loading Slowly
- Check server resource usage
- Optimise website code and assets
- Enable caching mechanisms
- Consider upgrading server configuration
Advanced Features
Scheduled Tasks
Use aaPanel’s scheduled tasks feature to:
- Periodically clean temporary files
- Automate backups
- Schedule service restarts
- Run custom scripts
Multi‑Site Management
aaPanel supports hosting multiple websites on a single server:
- Each site has independent configuration
- Different domains can point to different directories
- Assign different PHP versions per site
- Separate databases and FTP accounts for each site
Docker Support
aaPanel also includes Docker container management:
- Install Docker from the App Store
- Easily deploy various containerised applications
- Manage images and containers
- Configure container networking and storage
Conclusion
By following this guide, you should now have a solid understanding of the complete workflow for using aaPanel to build a website on a Linux server – from installation and site creation to domain configuration, security, and performance optimisation. aaPanel’s intuitive graphical interface significantly lowers the barrier to website deployment.
Key takeaways:
- Ensure your server meets the basic requirements before installation
- After first installation, promptly change default settings to improve security
- Configure your website parameters properly for optimal performance
- Establish regular backup and maintenance habits
- Choose the right optimisation strategies based on your actual needs
As you become more familiar with aaPanel, you can explore advanced features like load balancing and cluster deployment. We hope this tutorial helps you successfully launch your own website!